
How to Translate Videos with Vosko
Transform your raw media into a fully localized video. This guide walks you through the core end-to-end translation pipeline, from the initial upload to the final translated video with cloned voice dubbing.
Step 1: Upload and Configure Your Video
Before starting, ensure you have signed in to your account to access the secure workspace.
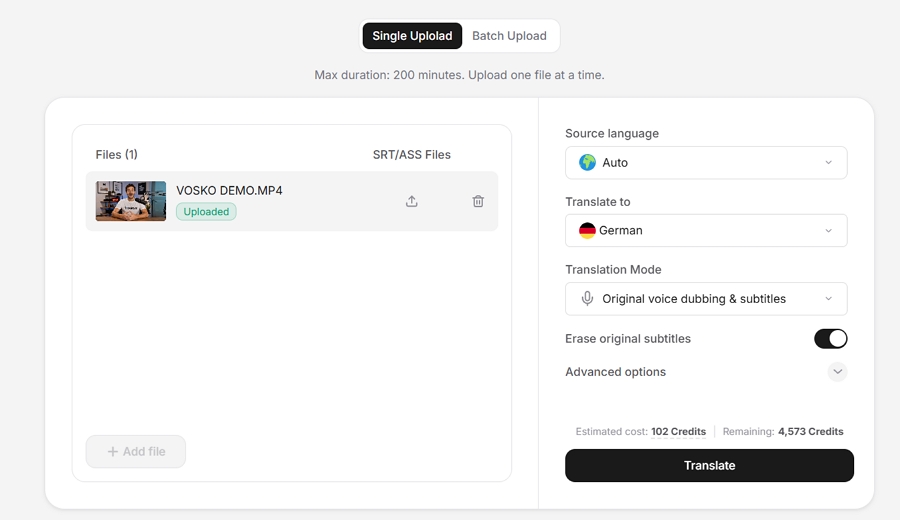
Click the Upload button in your dashboard to import your raw video. We offer two uploading modes to suit your workflow:
- Single Upload: Process individual videos up to 200 minutes in duration.
- Batch Upload (Pro Feature): Process multiple files simultaneously (up to 150 videos). Each video must be 6 minutes or less in duration.
Next, select your video's original Source Language and your desired Target Language.
Choose your Translation Mode:
- Original voice dubbing & subtitles: Clone the original voice into the target language with synced subtitles.
- Subtitles only: Preserve original audio and translate subtitles only.
Optional: Choose if you want to erase the original subtitles. The visual engine will automatically detect and cleanly erase them during translation (Note: this increases processing time).
Click the Translate button to begin.
Step 2: Preview Your Translated Video
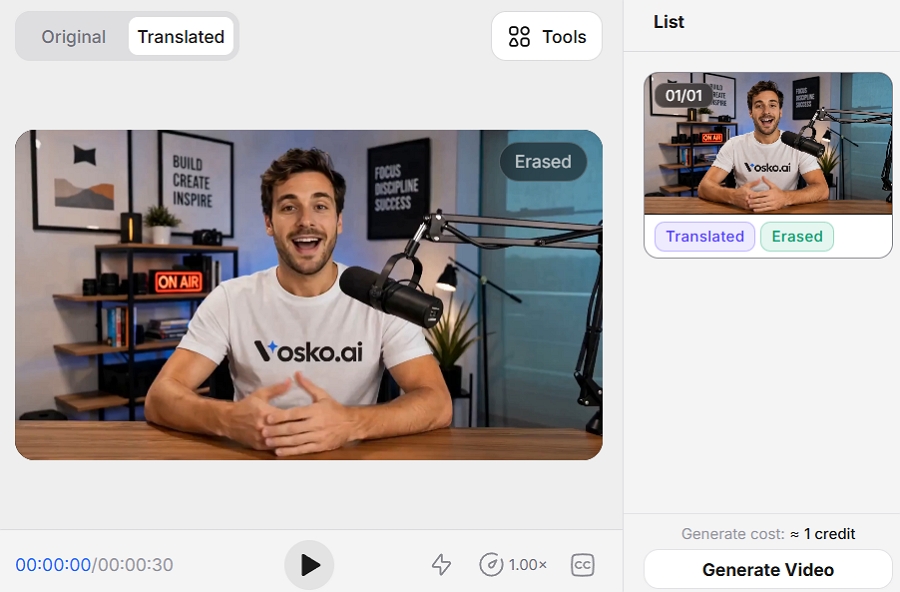
Once the translation is complete, open the Interactive Workspace. Click the Translated tab above the video and press play to preview the result.
Tip: If the translation, dubbing, and pacing look perfect, you can skip directly to Step 4 to export your video! If you need to tweak the script, adjust speakers, or refine the timeline, proceed to Step 3.
Step 3: Edit and Refine (Optional)
To perfect your video, use our comprehensive editing tools in the workspace:
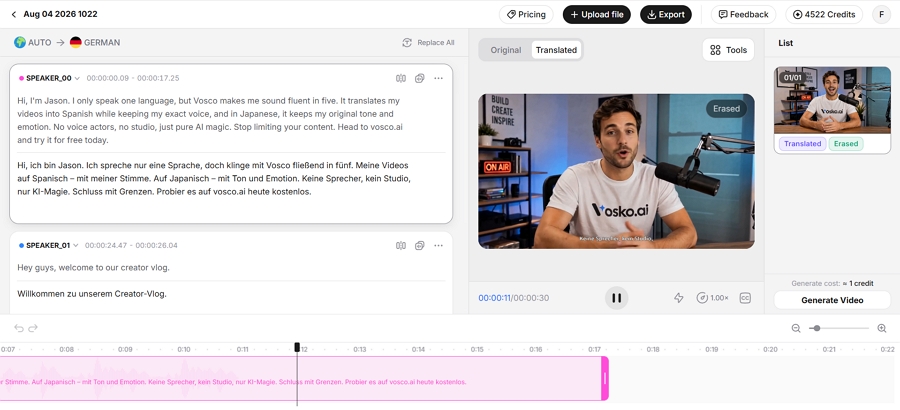
A. Edit Script & Redub
Take full control over the translation accuracy and voice generation:
Select the translation to edit: Click directly on the translated text block in the left panel to activate editing mode.
Modify the text: Manually type your changes into the text box, or click Re-translate to let the AI generate a new version automatically.
Update the dubbing: Once the text is modified, click Re-dub (or Save). The system will generate a brand-new cloned voice track specifically for that revised segment.
B. Restructure Subtitle Segments
Merge Subtitles: Select two adjacent subtitle blocks and click Merge to combine them into a single, continuous sentence. Vosko will automatically re-translate and re-dub the combined content. Be sure to review the final merged result for translation accuracy.
Split Subtitles: Place your cursor exactly where you want the break to occur within the text, then click the Split icon at the top of the subtitle block. This divides it into two separate segments for better on-screen readability and pacing.
Add Subtitles: Click Add Segment on the timeline to insert a new subtitle block manually. Simply type in your script, and Vosko will automatically translate the text and generate the corresponding voice track to complete your video's dialogue.
C. Manage Speakers
Vosko automatically analyzes voice features like tone, pitch, and timing to assign speaker tags (e.g., Speaker 1, Speaker 2).
When to manually correct speakers: Update tags if a single speaker is mistakenly split, or if multiple speakers are grouped together.
How to Add or Edit: Click the current Speaker Tag on any segment. You can easily Rename the speaker for clarity (e.g., "Host", "Guest") or manually change the assigned speaker from the dropdown list to correct any detection errors. Once corrections are made, click Generate Speech to apply changes.
D. Adjust Timeline
Due to differences in language structure, the translated audio duration may change.
Adjust Timing: Click the audio clip and drag it left or right on the timeline to sync with on-screen visuals.
Adjust Speed: Hover over the left/right edge of the clip to reveal the handle. Drag it to stretch (slow down) or compress (speed up) the speech instantly.
E. Bulk Replace
Use the Word Replace button in the upper right corner to instantly update repeated terms across the script.
F. Copy and Paste Voice
Click the Copy Voice button next to a speaker to copy their voice profile, then click Paste to apply it elsewhere.
Step 3: Export Your Final Video
Once satisfied, click Generate video, and then Export at the top right. In the export window, you can fully customize your download:
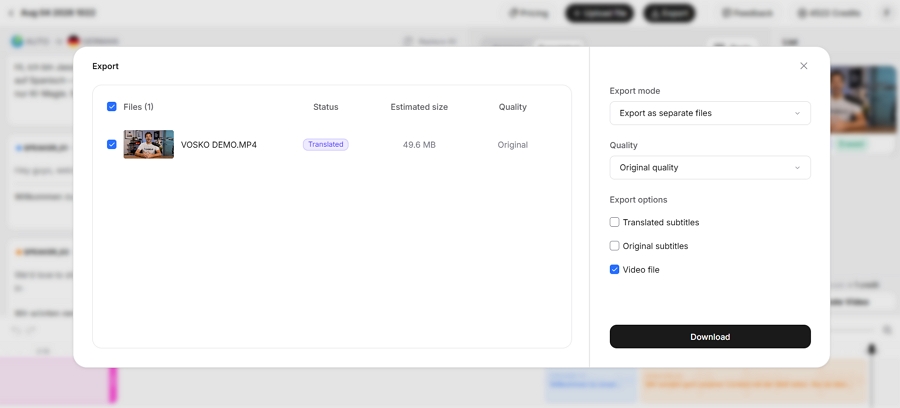
- Export Mode: Choose to export as Separate files or Merge into one video.
- Quality: Select Original Quality, High Quality, or Standard Quality.
- Export Options: Check the boxes to download your finalized Video File, Audio File, and Subtitle files (Original and Translated). Click Download to save them to your device.